Things have been AWESOME and busy and Im unable to keep up with the blog anymore. I will however leave it up and running so that those who loved the recipes can find them again. 
Maybe one day it will pick back up again - but not anytime terribly soon! Sorry! 

P.S. Guess who's back? She is 6mths old now and weighs more than our daughter did at a year (to be fair our daughter was tiny for her age!). I love watching the two of them. Given the chance she would make an awesome big sister. She read to her over and over all the while baby was yanking her hair, and whacking her with a hard plastic rattle!
 
It's about time! Ed Sheeran finally put out a video for The A Team!:) And it's pretty darn good! I know - it's not food related but it makes me happy and it's my section of the blog so THERE!:) 
Wont be updating too much this week, lots of things (good) going on here! I am still missing sweet Baby J and praying that she comes back, but there is plenty to keep me occupied. For one, my hubby is home for 3 weeks straight for the FIRST TIME this year! And also my girly has a gymnastics meet on Saturday!:) And we are working on Christmas shopping (got my girly a decent Karaoke Machine). Hope you all have a great week! Check back Sunday for photos/video from her meet, along with photos of any ribbons/medals she gets!
 
After my bestie April made her Banana Bread with struesle topping, I've been craving some myself. However looking at her recipe, while I knew it probably tasted flat out AMAZING, I am a health nut and just couldn't bring myself to do it. (though if she sent me some I sure would snarf it down!)
So I set out to figure out how to alter her recipe, but then came across another one and decided it was the one to try. It's a whole wheat recipe which usually kind of throws me off a bit. Normally prefer half wheat and half white. But I decided to follow along and LOVED it! So here now, I will share it with you! 

Ingredients:

1/3 c Almond Milk (or Skim Milk)
2 Eggs
2/3 c Unsweetened Apple Sauce
2 Over Ripe Bananas
2 1/4 c Whole Wheat Flour
1/4 tsp Salt
1 tsp Baking Soda
1 tsp Vanilla
1 tsp Stevia Powder
1 1/2 tsp Cinnamon

Directions:

*Preheat your oven to 350 F
*Combine wet ingredients in your stand mixer. 
*Combine all dry ingredients in another container.
*Slowly add (little by little) the dry into the wet, allowing your mixer to fully incorporate each time.
*OPTIONAL: Add in your favorite nuts - we used pecans
*Grease your 9x5 loaf pan, then fill with bread batter.
*Bake 45 min to 1 hour (45 minutes was PERFECT here!)

It's pretty yummy though obviously due to the high wheat content, it's not as moist as a prepackaged treat at the store. But it's by no means dry. Also - it's VERY filling (One 1in slice filled me up completely and that's without a meal before!). 

**I also made another batch of the coconut body butter so my girly has hers in her bathroom, and I have my own in mine. Mine  I chose to add vanilla beans to - pretty and smells fantastic! You can use this stuff without scent added as a diaper rash cream for cloth diapering mamas, and lubricant during sex - it's safer and healthier than the pricey stuff at the store! And it's not sticky!:)
 
First off - baby girl has gone back to her family, there is some talk that she may be headed back to our home shortly but that's all in the government's hands and we know how well that works. 

I've had much time to fill since she left and have tried to make good use of it! Food wise I've made a lot of soup (strange for me as I normally have to be in the mood for it). I've had cabbage, Zuppa Tuscana My Way and right now I have White Chicken Chili  in the crock pot. 

Today I am going to show you how to make Body Butter with just 2 ingredients required (there are additional if you choose). I've made butters before but normally do so with cocoa butter and shea so this was a new one for me and I love it! It's much cheaper and doesn't require me to have it shipped, and you can easily find the ingredients in your local grocery stores!:)

Ingredients:

1c Coconut Oil (I try to get unrefined pure oil)
1 tsp of Vitamin E Oil
Essential Oil of your Choice (I chose lemon today but will make some peppermint shortly)

Directions: 

*Place both oils into a stand mixer and whip for about 5-7 min on medium high. 
*When you notice a whipped frosting appearance, shut the machine off and add a few drops of your essential oil and then turn back on for another minute to whip it in.
*Place into a jar and store where it's below 75 degrees.

****If you don't have a stand mixer - that stinks! But you can still do this without one by placing the items into a bowl and using an electric beater. You really cannot do this with anything else.
This is especially nice right after a shower, and shave! My girly has problems with Psoriasis during the winter months (sunshine helps!) and so we can use this on her without causing further irritation. This is literally food grace materials so you could technically eat this (I dont suggest it though)! Compare this to the body butters that you find in the stores ingredients wise! And this is MUCH cheaper too as a high quality butter will cost you about $10-$15 a tiny little 1/4 lb tub. This makes
 
This week has been a rather sad week for me as the sweet little Ladybug is going back to live with her parents. She will always be in my prayers and I hope that they are really doing well and will take good care of her. 
So what is a girl to do with all this extra time on her hands? ANYTHING AT ALL! 
I am currently making a tincture, making Lemoncello, planning a playdate for my girly and a friend from gymnastics and planning a very large and time consuming project that will benefit all of the family and generations to come. 
This is homemade beginnings of an Herbal Tincture. After my lovely brush with Staph at the Zoo and the subsequent healing of it with the lemon balm haphazardly mushed up and tied onto my leg - I decided a tincture of this stuff is in order since it lasts for years and works.  This one in particular has Lavender, Lemon Balm, Lemon and Lime Basil and is covered with a cheaper brand of 40 proof. Just minced the herbs and placed them in a jar, then covered with vodka and will give jar a shake each day and let it sit for 2 wks. Then Ill strain it and put into a jar and it can be used on skin or orally for stomach issues and nerves. 
My parents have a huge Meyer Lemon tree in their backyard and always hook me up when she is full of fruit! Here's just a small peek at the beginning of harvest time! I chose to make Lemon-cello this time around. So I had to peel the lemons (Meyers are known for their really thin skin) and then use a knife to carefully remove the pith and put all the cleaned peel in the jar. Then covered with a bit of Grey Goose (thanks Cruise Ship friends!) to begin their infusion. In about a week, I will finish this up and post again!:) 

The big project has no photos yet. But here is a very general idea of it. I am going to take my Mom out to her childhood stomping grounds armed with a camera and recorder. We are going to get photos of her childhood home, hospital she was born in (which turns out to be Kitty Cat Club now - a TITTY BAR! LOL), Elementary School, Middle, High. Where she hung out after school. Where Dad proposed to her. The fountain at the cemetery that she Mr. Bubbled etc. I want to know all the stories about her growing up. I will then scrapbook it all out. I will do this for myself too with the same info, and for hubby (this will take a trip to Mississippi) and my Father (a trip to California - probably the last one Ill do since it will take some planning and finanaces). I think it would be neat to have the stories and photos and information in an easy way to follow. It will be something neat to pass down to the kiddo and she can do one of her for her kids etc. I think it will be fun to bond over it all as well! I am pretty stoked about going with Dad to California too! He was only a baby when he was there (born there and lived there I think 2 years). 

That's all for now. Going to bed but just wanted to update while I had a minute!
 
It seems like it took forever cause I would get so close -and then go up again. Finally I am hanging out at this weight and am no longer punishing myself for it! By punishing I mean, I couldn't fit my jeans so I lived in sweats and went to the gym like a crazy girl. Im still going to the gym - but am considering getting Zumba Certified!:) We will see! 
Anyway - Im in a dress today for a funeral but decided to finally prove my loss! I'd look better if I had cleaned the mirror first, and maybe wore some spanx but such is life. When you take a photo with a cell phone - you can't exactly ed
 
So there is a TON to blog about and not enough time to do it all at once so check in over the next couple of days! We have gone to the Houston Zoo for a visit (on Columbus Day - wearing jackets!), more pictures of both the girls, and even some FOOD pics/recipes! It's fall, y'all! I love cooking this time of year! Ill get some photos up today but like I said - it's going to take a few days! 
 
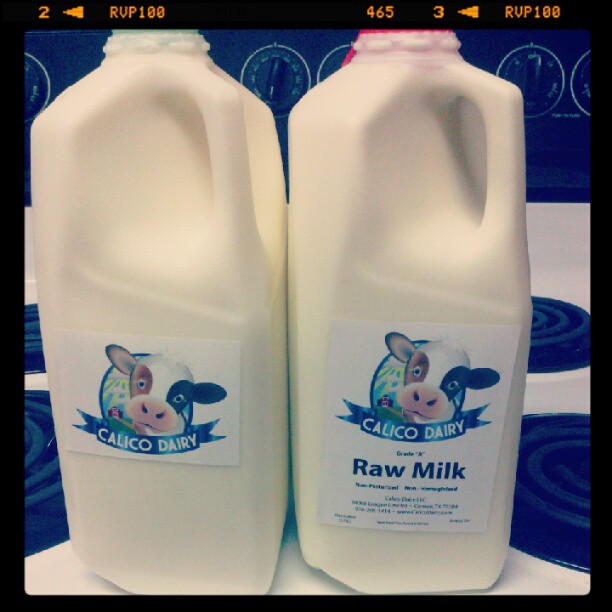
We use a local dairy that sells Raw cow's milk and goats milk from grassfed, no hormone/antibiotics animals. They also sell beef, and lamb and will soon be selling chicken. They also sell Raw butter, kefir, yogurt and free range eggs. I love this dairy, they are so clean, so friendly, and very happy to show you around whenever you wish - which if you are looking for a raw dairy - is a MUST! They are also the only Certified Raw Dairy in our big city! 

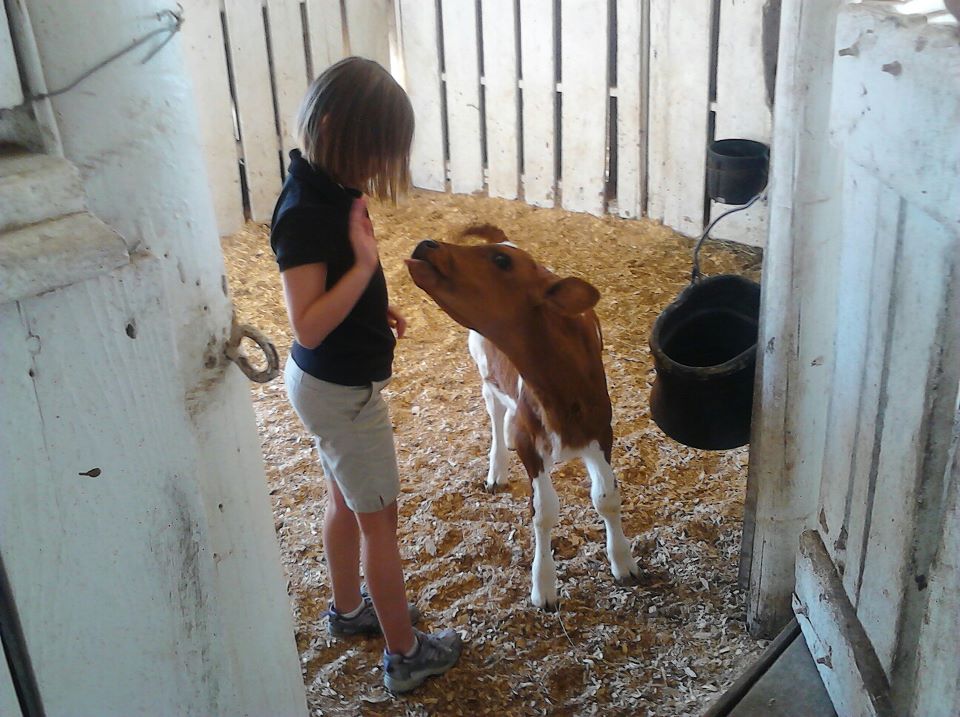
Yesterday we got to meet a 1mth old (born 2 months premature) calf while picking up a half gallon of cow and half gallon of goats milk. My girly thought this was facinating and thought this cute calf had the prettiest eyelashes! The baby even used her as a human pacifier! 

So many people ask me 2 things every time they hear about our milk choices (and no, I wont go into the Raw Milk benefits - if you want those check out www.realmilk.com

1. Why do you get Cow AND Goat milk? Why not one or the other? - Really the reasons are fairly simple. Goat milk for some reason settles in my stomach better but its slightly more expensive. My family however handles cow milk just fine so it's cheaper to feed them on cows. 

2. What is the difference between the two milks, do they taste different? - The main difference in appearance at least is that if you leave them in the fridge over night, goat's milk will only develop a very slight layer of cream, while Cow will get a THICK layer. Goats milk is naturally homogenized (the fat is naturally distributed through out the milk) where as cow's milk is not. 
They don't really taste different at all (if you shake the cow's milk before pouring that cream will mix back in - or you can skim the cream and use it for butter which will change only the texture of the milk slightly from the goats). The ONLY time I would even be able to tell the difference between the milks in a blind study would be if one or the other was known to get into an onion patch. Then you might get a slight flavor difference. 

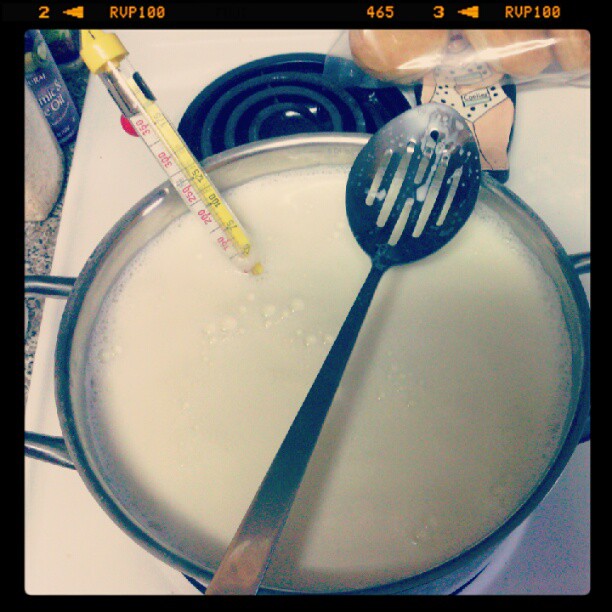
Yesterday, I made Farmer's Cheese with a gallon of NON RAW (it would kind of ruin the purpose if you heat raw milk) Whole Milk. I thought I would share with you on how to do this yourself! :)

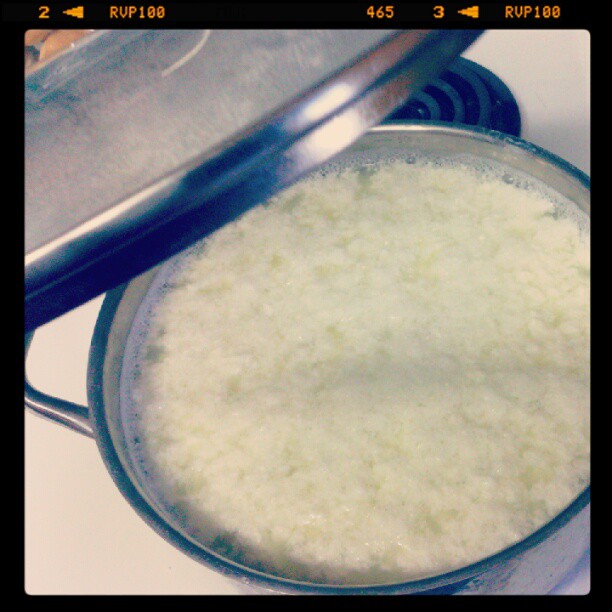
Step 1: Bring a gallon of Whole Milk that is NOT Ultra Pasturized, to room temperature on the counter. Then pour the entire thing into a sterilized heavy bottom (heavy bottom prevents scorching) pot and bring it to about 185 F. Then remove it from the heat and see step 2. (You dont need to stir constantly - but I usually do every couple of minutes)
Step 2 - After you move this off the heat, stir in 1/3 cup of white vinegar and 1 tsp salt for about 30 seconds only. Then cover  and let sit for 2 hours. Try hard not to go stir and bother it. Stirring too much can cause Ricotta to have a grainy texture much like the store bought. The purpose of making this yourself is to have a MUCH better texture and flavor than store bought!:)
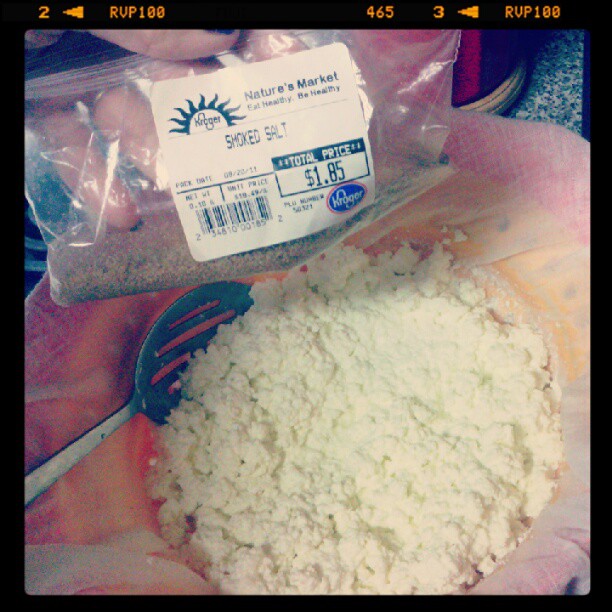
Step 3 - Use a sterile butter knife to gently section the curd by going straight up and down in one inch strips and then across. Doing this will help you to drain the weigh more fully. Then ladle the curd into a collander lined with Butter Muslin. Its important that you don't use cheese cloth as the holes are too big in that, butter muslin is just slightly see through and easily washed in the washing machine.  Let the curd drain as long as you like. I gave it about an hour and then mixed in some smoked salt for flavor. My herb garden is newly planted in the Aerogarden but the plants are still young and I didn't want to pick at them yet, but normally I would mix an herb or two in for good measure.
Once the curd has cooled to room temp, then place into your storage container and move to the fridge. 
If you like, save the whey as there is a lot of protein in there! You can use it in soups!:)

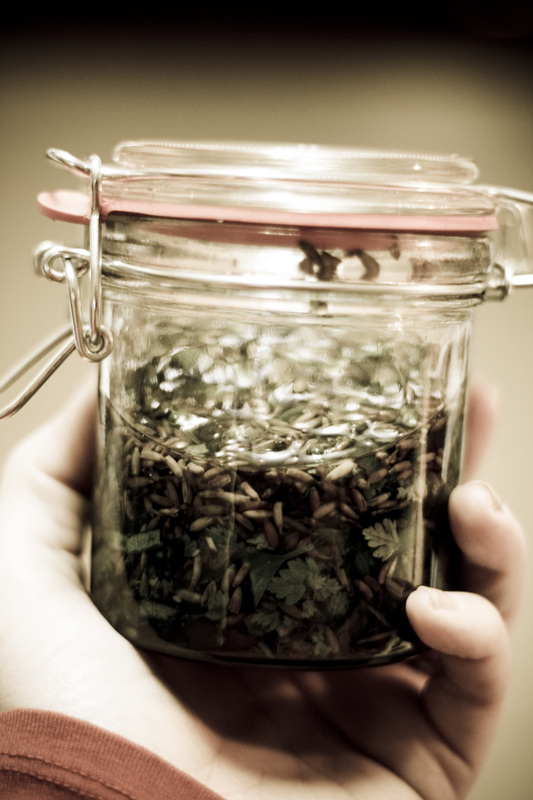
In case you are wondering what herbs we have going in the Aerogarden this time, we have :

Oregano
Chevril
Parsley
Lemon Basil
Lime Basil
Red Robin Basil 
Lemon Balm (used for insex
 
Just realized my cable service with On Demand offers Karaoke and Im seriously considering subscribing so that when we have "Girls Night" we can play a good ol game called, " Karaoke Roulette" where the other folks pick the song for you, and you don't get to watch the words but have to try and sing the song! We can sing for real too of course, as I've done at actual Country Western Dance Halls! 
All that's stopping me is the dread of calling the cable folks cause it's always a pain in the ass, ya know? Well, and possibly price - we will see if it's cheap enough! 

BTW - New FOOD post coming up later tonight! I took some pictures at the Raw Dairy we go to regularly. There was a premature calf born recently and my daughter got to pet her and become a human pacifier!:) And I made farmers cheese (well, not with my Raw milk as that would negate the purpose!). YUM!
 
Miss Priss on her first day of Third Grade! She looks so grown up and sassy in this shot! **sniffle** Today is her Adoption Day anniversary! We took some cookies up (baby and I) to celebrate with her at school! SH
Snuggle time!:)  This is before our rug was brought back - oh yeah I didn't tell yall about THAT nightmare did I? Well on day 2 of flooring, the guys moved our rugs (the large one in the livingroom and 5x7 in the kitchen) outside so they could floor. They also moved our washer and dryer out there. Then out of no where - POURING RAIN all over all of it. Yep. So thankfully the washer and dryer weren't ruined, and neither were the rugs, but we did have to have them shampoo'd. 
I feel like I should get a prize for painting the tiniest toenails ever...just sayin.
Moby time - about a minute before she fell asleep, this thing knocked her right out!:) Oh and there is a tiny peek of our floors, the wood and the procelain. 

BTW - Now that I have my Moby made, I will start cooking again and posting food stuff, it was just hard to do it with her always wanting to be held! Now I can get the best of both worlds :)